OK, I want to keep a build diary of the studio I’m working on. I’ve learned a lot from various build diaries, mostly on the amazing John Sayers forum. So perhaps this diary will help someone. I will likely mirror the diary that I keep here on that forum, or possibly the TapeOp forum or maybe even Gearslutz.
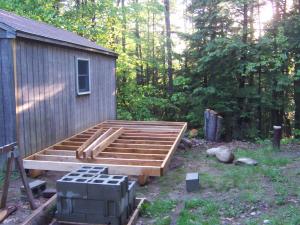
I don’t have much to post just yet. Technically, I haven’t even started on the build proper yet; I’m building a shed adjacent to the garage (where the studio will ultimately be), so that I can store the stuff presently in the garage, leaving room for the studio.
My family and I have chosen a simple lifestyle, we don’t have a big house or a lot of space. Our garage is a separate building, a 12×19 single car garage. The studio will take up about 12×15 of that (actual inside dimensions will be closer to 11×15).
I also don’t have a huge budget for this build. I’ve already acquired 2 cases of Green Glue to get started. For those who don’t know, this stuff is not actually glue, but is rather a viscoelastic compound that, when applied between 2 sheets of drywall (or similar material), will dramatically cut down on sound transmittal. Green Glue, along with the HVAC machine down the road, will likely be the single largest expense of this build.
This build will happen as I get budget; I’ll pick up materials as I can. Also, I’m relying heavily on free/recycled materials for this build. The build will go slowly, both due to time and budget constraints, so I can afford to be patient.
I’ll save details of what the studio will be for a later post (since this will be down the road for me), but for now I’ll say that it will be a one-room design. I simply don’t have enough space for multiple rooms. This room will be enough for me to do mixing, recording overdubs or small ensembles, or even a drum kit with a tight fit. That will be more than enough for me; Crafted Recordings is still mobile so if I need a good room for a full band I have options nearby.
Objectives are that the room is soundproof, both so I don’t disturb my family if I’m cranking music at 1am, and so the logging trucks that rumble down my road at 50mph don’t get picked up by my microphones. Also, the room has to sound good both for listening/mixing/mastering and for recording said overdubs. I’m particularly interested in a good acoustic guitar sound, since that’s my main instrument.
The studio will also serve as my home office for my work with RealTraps.
So…. on to the pictures. Here’s the garage before construction begins:

The shed will be to the right, and will butt up against the garage.
Next, this is the area where the shed will be, with all the crap cleared away:

I had to cut down a 5-trunked maple tree, you can see the stumps toward the right of the picture. I could have left it there for the build, however our garden beds are just to the right and now they get about 2-3 more hours of sun per day. Sunlight is a premium, our land is almost entirely forest with a lot of shade.
Interestingly, 2 of the trunks of the maple tree had grown into one another, leaving a log that is shaped like a harp:

Very cool. I’d love to carve this down and actually make a harp out of it, although it would also make a very interesting table base.
In this shot, you can see the sonotubes (scored free from Craigslist… yay!) that have been placed, but not yet trimmed to length:

Note the pile of cinderblocks. Originally I was going to use those for the foundation of the shed, but since it will be attached to the garage, and since I live in Maine, I decided the last thing I need is a frost heave messing things up down the road. A friend of mine convinced me to use the Sonotube and concrete. Good call.
My daughter was helping me mix concrete today. She also took a bunch of pictures, including this one:

Yep. Proud dad and his kiddo. :-DÂ Â She laid gravel down at the base of each Sonotube, and took a picture of it when I wasn’t looking:

She also took this shot of me mixing up the concrete:

I’ve never actually mixed concrete before today. A good friend of mine has been very helpful so far in the build (we’ve spent many hours building stuff over the years) and has experience with concrete. He was most helpful and reassuring: “Dood, you can cook. If you can follow a recipe, you can mix concrete.” 3 quarts of water per 80 lb. bag of concrete. Simple enough.

And finally, once all the concrete was poured, and the metal brackets submerged in the concrete (to attach the beams), I laid the beams in place. Everything is level! Score!

So that’s where things stand at the moment. Good progress today. I have a bit more digging/landscaping to do, to flatten the ground under the shed, and to put a bit more earth around the sonotubes so they are (more or less) completely buried. Once the concrete cures in a few days I’ll install the floor joists. And once that’s done, I’ll officially be out of materials and will need to order the floorboards. There is a great lumber mill around the corner from my house. They sell hemlock at great prices, this is what I’ll use for the entire build as it’s cheap and water resistant like cedar.


